Monday, May 12, 2014

A Surprise Orchard

Dad surprised me with nine fruit trees that he found on sale half-price. He found two of my favorite apple variety HoneyCrisp, and a Granny Smith and a Gala for variety and pollinators. He got three peach trees, two Elberta and one Georgia Belle. And finally, two plum trees, a Blue Damson and a Santa Rosa.

We spent all day digging the holes for the trees on a sunny south facing bank in the back yard.


I have always wanted fruit trees so to finally be able to plant an orchard is a dream come true. I can't wait to see these beauties leaf out this year and in a few more years we will have fruit! My mouth is watering in anticipation of fresh homegrown peaches picked at the peak of ripeness.

We still need to install a heavy mulch around the base of the trees to keep the soil moist and to keep weeds down. For right now, we have used grass clippings, but I plan on putting some straw down to make a thicker mulch. Two things you want to keep in mind when mulching your fruit trees:

  1. Keep mulch away from the bark of your trees. Mulch harbors insects, keep it at least six inches away from the trunk . 
  2. The area being mulched grows with the tree, the mulch should extend to the drip line at the end of the trees branches. 

Wednesday, April 23, 2014

Can you grow Strawberries in an old tire?

I sure hope so because that's my plan for the boy's strawberry patch this season. We've been filling a large tractor tire and two smaller tires with compost and straw from the goat pen and finally got them filled up enough to plant. I had a little tray of 6 plants that we carefully tucked into the straw.


I was proudly showing off the newly filled tire planters to my neighbor EJ, who, being a local, kindly pointed out that in the South Carolina summer sun, they would probably be cooked in the tires. Yea, I didn't think of that, you see I'm used to growing in the mountains where you are always working to warm up the soil and extend your short growing season, baking the plants in their beds never occurred to me. I am having to practically start from scratch here, everything I knew about plants and growing in the mountains is right out the window.  Different soil, different climate. This is our first growing season here, I know I'll make mistakes but I'll be learning every step of the way.


Well, I wish you luck strawberries, I hope you don't get cooked before harvest!
Now before you go accusing me of cruelty to strawberries I do believe they have a good chance of survival, they get some shade in the late afternoons and with three young garden helpers to be sure they're well watered, I'm sure they won't suffer from neglect.


How do you grow your Strawberries?

Tuesday, April 22, 2014

This Week in the Garden - Amazing Changes

I spent all weekend in the garden with my dad, we had a great time digging in new beds for potatoes, tomatoes, rhubarb, lettuces and more!


It's a lot of fun planning and deciding where all of the different plants will go. We purchased our seed and plants from our local farm co-op

We used recycled pvc pipe for the borders around the perimeter bed to keep the big wheel traffic out.

We hauled numerous wheelbarrow loads of used goat bedding (straw/manure) to build up the red clay soil.

The radishes are almost ready to eat!

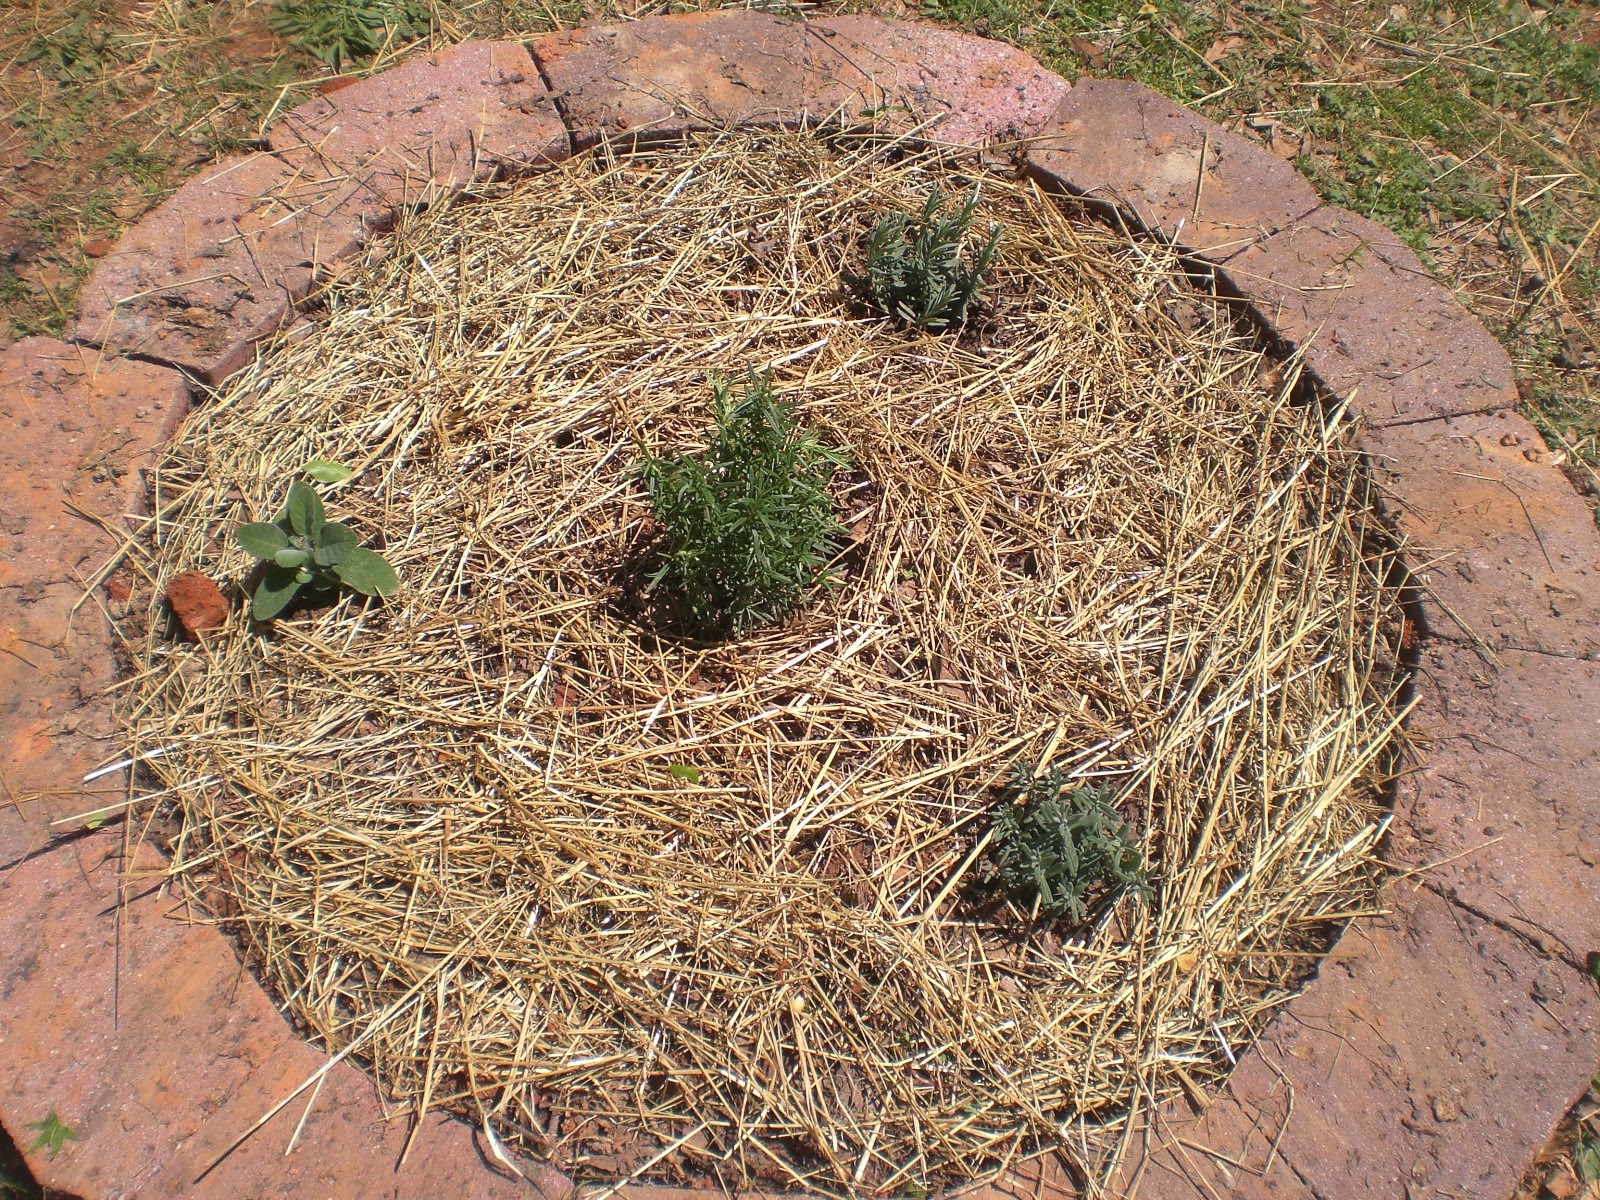
I started my herb garden with Rosemary Sage and Lavender plants and started Oregano, Thyme and Basil from seed.

We improved the border around the beans corn and onions


Monday, April 21, 2014

Re-cycling dyed Easter eggs...Fun Craft Ideas

Now that the egg hunts are over what can I do with these colorful battered eggs?


This year we got store bought white eggs to dye for Easter. That's right, store bought eggs, six dozen! And a NEON dye kit which produced the most vibrant eggs ever. I enjoyed admiring my kids amazing egg dying artistry.
Now, you may be thinking :
"How unsustainable and very un-homesteady* of you! Dying store bought eggs with artificial dye instead of home-made herbal dyes on your free range fresh eggs"  
Oh well, sometimes simplicity wins out.  But now all the Easter Egg Hunts are over and these battered eggs need to go. I usually crush up shells for the garden, (they're great around tomatoes to prevent blossom end rot) but wasn't sure about the dyes, they're supposed to be non-toxic and food grade but I didn't want to try it, so I did a little research and found some fun ideas to try with the kids.

Here's a fun mosaic craft using colored eggshell bits Mosaic Egg Craft that I found at Egg farmers of Alberta

Pendants and earrings made from eggshells The Egg Shell Pendant - Craft Tutorial video.

Here's a vase tutorial at Crafts by Amanda Egg Shell Mosaic Vase

How about a decoupaged jewelry or trinket box? Decoupage with Egg Shells

Saturday, April 19, 2014

On Craftsmanship


What is Craftsmanship? It evokes a sense of true mastery and skill in workmanship, of creating something that is both beautiful and enduring with attention to detail.


To Craft is to make or produce with care, skill, or ingenuity.

Crafting involves making something in a skillful way by using your hands

crafts : objects made by skillful use of the hands


I learned about craftsmanship from my grandfather "Bud" He taught me the value of taking the time to do things right the first time. How to measure twice and cut once, how to take care of your tools so they will take care of you, and how to always do your best so you can be proud to put your name on your work and stand behind it.


Bud was a builder and a true craftsman, recognized for the uncompromising quality of his work. He built a house in the early 50's for my Great-grandmother. It's a small, modest farmhouse, but the level of attention to detail in the interior woodworking is amazing, you just don't see that kind of craftsmanship everyday.


Still to this day, one of the first things new visitors comment on when they walk into the house is the woodwork. "Wow, this woodwork is amazing!" is often exclaimed, and I am always proud to say, "My grandfather built it." He cut every board and hammered every nail. THAT is true craftsmanship, not just to create something that you can be proud of, but something that your family can be proud of for generations to come.


And that's what we are striving for here on our crafty farmstead, to build something our children and one day our grandchildren can be proud of.


Friday, April 18, 2014

Breaking Ground: How to establish new garden beds

Our new garden is an old pool that was filled in with red clay fill dirt. Someone must have gotten tired of all the upkeep and maintenance required to keep a pool nice and clean and just had it filled in. It has been growing weeds ever since. I decided that it was the perfect place for my garden and my husband decided it was the perfect place for the kids play yard, so now it's both, part playground, part garden.


It may not look like much now, but on the left side you can see some straw mulch covering our onions, beans corn and sunflowers. The three circles in the middle will eventually be planted with herbs. We have only just begun! Notice the fencing? That's the most important feature right now, it contains our twin two year old toddler tornadoes, and keeps the chickens and goats out of out garden.

Breaking ground in a new garden bed can be a lot of work. Here's how we prepped our beds for planting.

  1. First we double dug the beds. Breaking up the lumps of red clay as we go. A tiller would have made this much easier, but since we don't have one, we used a shovel. 
  2. Add lots of organic material and manure (compost!)
  3. Plant seeds or started plants
  4. Mulch heavily

Written out like that it seems so easy, just 4 simple steps, but when you're out there with a shovel in your hands it isn't quite as easy as it looks. The payoff is worth it though, I can't wait to see our garden grow!

Thursday, April 17, 2014

A Brief History of Our Crafty Homestead

The Crafty Farmstead was born from our desire to produce own fresh healthy foods for our family.

We made our first foray into self-sufficient living in 2005 in the mountains of Western North Carolina. We started with container gardening on our porch. We grew tomatoes and peppers and cucumbers.  I learned how to can and preserve, and how to make homemade baby food for our firstborn son.  

In 2007  We decided to try to grow more fruits and veggies. With the help of our toddler, we scratched out a small vegetable garden from the overgrown hillside beside our cabin. I remember how he loved helping us water and tend the plants everyday. We rejoiced in re-seeing life, through our young sons eyes, enjoying the simple pleasures of eating fresh picked strawberries and crunchy cool cucumbers.

In 2009 we added our first chickens, a pair of Barred Rock hens for eggs. Once we experienced the joy of truly fresh eggs we knew there was no turning back. Since that day I have only purchased one carton of eggs from the store and that was only so my kids could dye Easter eggs with white eggs (ours were too brown to dye)

In 2010 we got our first two Nigerian Dwarf  goats and 6 more hens. We bottle raised one doeling Mandy, and bought a second doeling Legs,(yes her name is Legs, she kicks a lot)  that was already weaned. Later we bought a bred doe Ginger, who became our main foundation doe.

In 2011 we were blessed with twin boys! Even though I had my hands full, I still tried to keep the garden going. I missed my gardening, but we had to scale it back for a couple of years, I just couldn't keep it up. We soon realized that our two bedroom farmhouse wasn't going to be big enough for a family of five.

In the fall of 2013 we moved to South Carolina to be closer to our families. Our new home is a great log cabin and while it's modest in size, it's much bigger than the farmhouse and I love the open floorplan. There is a lot of fixing up to do but we all have so much more room here. And since it's not on the side of a mountain, there's actually lots of usable land too.We also expanded our chicken flock with the addition of a trio of heritage French Black Copper Marans. 

This year we are hatching out our first eggs from our Marans. This is our first Spring on our new homestead and we are ready to begin crafting our homestead with new gardens and walking paths. new chicken pens, and lots and lots of fencing.

We love producing our own fresh foods and continue striving towards greater production and sustainability.